Editing Instruments
The project explorer displays the list of songs and instruments in the current project. This section is only going to cover editing of instruments and arpeggios. Please refer to the Editing Songs & Project section to learn how to edit project and song properties.
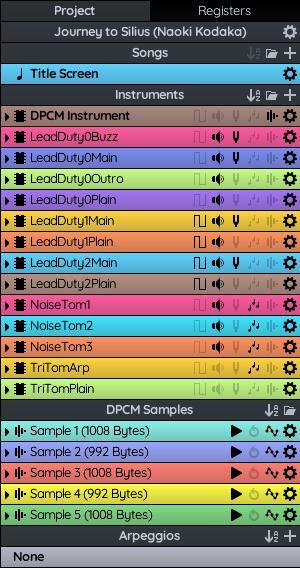
Most standard instruments have 5 buttons :
- The duty cycle envelope
- The volume envelope
- The pitch envelope
- The arpeggio envelope
- DPCM Samples
An envelope is simply a parameter that can change over the duration of a note as it plays. It can be used to create vibrato, tremolo, change the attack and release of a note, for example. If an instrument currently has no envelope for a particular type, it will appear dimmed.
Expansion instruments may have different envelope types. For details on Expansion audio instruments please visit the Expansion Audio section.
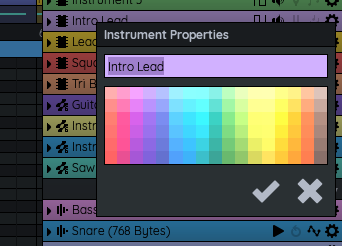
Editing instrument properties
Clicking on the little gear icon next to an instrument (or right-clicking and selecting "Instrument Properties...") will show its properties (Name and Color). Like most things in FamiStudio, you can rename the instrument and change its color.
Most instruments also have parameters that can be edited in real-time by clicking the little arrow on the left side of the instrument.
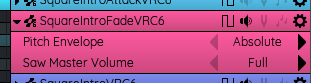
Parameter(s) that is available on most instruments:
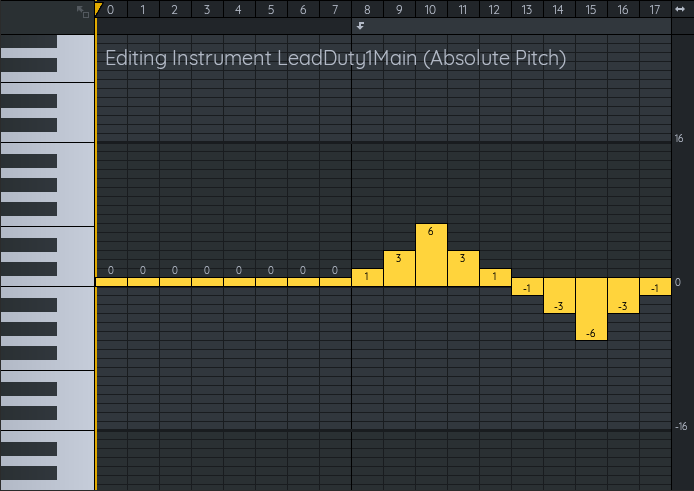
- Pitch Envelope : Defines how FamiStudio will interpret the values in the pitch envelope.
- Absolute : By default, FamiStudio's pitch envelope are absolute. Meaning that the pitch envelope value you enter is the pitch you are going to hear. This is especially useful for vibrato where you can draw a simple sine wave.
- Relative : Relative pitch envelope will repeatedly add the value of the envelope at each frame. For example, an envelope with a single value of +5 will produce a pitch of 5, 10, 15, etc. on frame 1, 2, 3, etc. In order words, you are controlling the change in pitch, not the pitch itself. This is useful to create pitches that rapidly ascend or descend (ex: bass drum effect). This is how FamiTracker handles pitch envelopes.
For some numeric parameters, it is possible to type the value using the keyboard by selecting the "Enter Value..." option from the context menu.

Adding instruments
You can add an instrument by pressing the "+" sign, and you can delete one by right clicking it and selecting "Delete Instrument". Deleting an instrument will delete all notes used by that instrument.
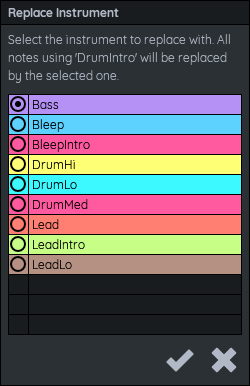
Replacing an instrument by another
To replace an instrument by another throughout the entire project, you can right click the instrument and select "Replace Instrument...". This will bring up a list allowing you to select the new instrument. This works similarly on mobile, except the list is less colored.
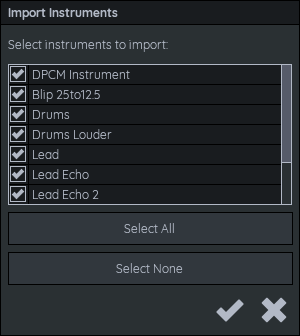
Importing instruments
You can import instruments in your project from any supported input format, as well as FamiTracker instrument files (FTI files, official FamiTracker 0.4.6 only) by clicking the little folder icon.
When importing instruments from another project or a FamiTracker file, you will be prompted with a list of instruments to import. Simply check the instrument to bring over.
Also, when importing instruments from another FMS file that uses DPCM samples, you will also be able to import the "DPCM Instrument" from that project. This will import all the samples and their assignments to keys of the pianos.
Note that instruments that are using incompatible expansion audio will not be able to be imported. Also, instruments with the same names are assumed to be the same. If you project already contains an instrument called "Piano" and you try to import another one called "Piano", nothing will happen. The same happens with songs. You are responsible to uniquely name your instruments if they are different.
Organizing Instruments
You can create little folder in the Project Explorer by pressing the "+" button. Folders can be created for songs, instruments, DPCM samples and arpeggios. Folders cannot contain other folders, so it is a single-level hierarchy. Items outside of any folders will always be at sorted higher that folders.
To move items inside a folder, simply drag it inside the appropriate folder. Folders themselves can be re-ordered and also obey sorting rules. If sorting is enabled, folder will be sorted, as well as the items inside them. Moving a folder or and item manually will disable auto-sorting.
There are also shortcuts to collapse/expand all folders if you right-click on a folder.

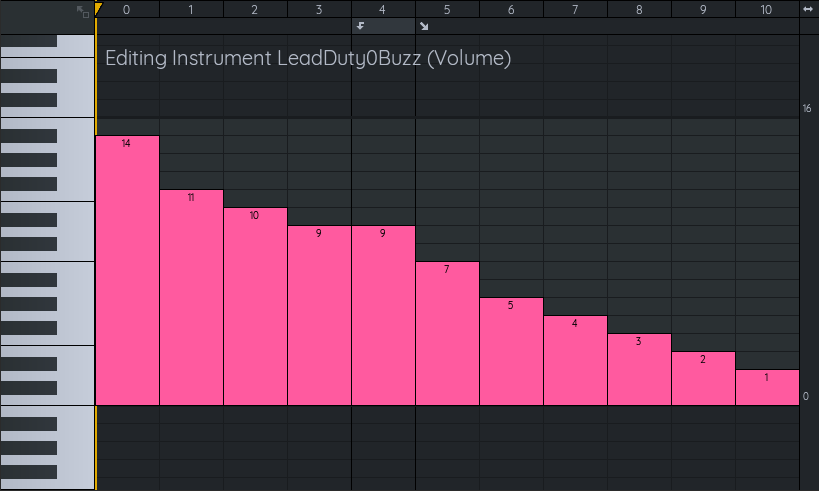
Editing instrument envelopes
Clicking on an envelope icon in the project explorer will open the envelope of that instrument in the piano roll. The length of the envelope can be changed by clicking and dragging the little arrow icon in the top right corner. Setting the length of an envelope to zero will essentially disable it.
The loop point of an envelope can be set by left-clicking in bottom part of the header or by using the context menu.
Volume tracks (and N163 wave envelopes) are also allowed to have release points. Releases are played when a release note is encountered and terminates the loop by jumping to the release point. This is useful for fading out notes smoothly.
The release point is set by right-clicking in the bottom part of the header, or by using the context menu.
On mobile, you can editing envelope values individually by tapping them. But a much more natural way of drawing envelope is by first long pressing, waiting for the prompt, and then drawing the shape of the envelope.
Copying envelope values
Right-clicking and dragging in the envelope editor allows for range selection of envelope values. These can then be copy and pasted elsewhere.

It is also possible to paste envelope values coming from raw text. Any series of number that is space, tab, comma, semicolon or newline separated can be pasted in the envelope editor.
You can also copy envelope values as text if you want to use them in another app. To do so, use the "Copy Selected Values as Text" option from the context menu when there is a valid selection.
Copying envelopes
Clicking on an envelope button and dragging it on another instrument will copy that envelope from the first to the second. Note that unlike FamiTracker, envelopes are not explicitly shared between instruments. Identical envelopes will be combined when exporting to various formats, but it is your responsibility to optimize the content and ensure that you limit the number of unique envelopes.
On mobile, you first need to tap on the instrument once to make the white highlight appears around the envelope, then you can drag them to another instrument.

Copying DPCM sample mappings
You can also copy entire set of DPCM sample assignments (which samples are assigned to which key of the piano) from one instrument to another by dragging the little DPCM icon from one instrument to another.

On mobile, you will first need to tap the instrument once to make the white highlights appear.
Clearing or Deleting envelopes
Envelopes cannot be deleted per-se, they can be cleared to they have essentially no effect. To clear and envelope, simply select the "Clear Envelope" option from the instrument context menu.
Editing DPCM Samples
DPCM Samples are covered in depth in the DPCM Samples section.
Editing Arpeggios
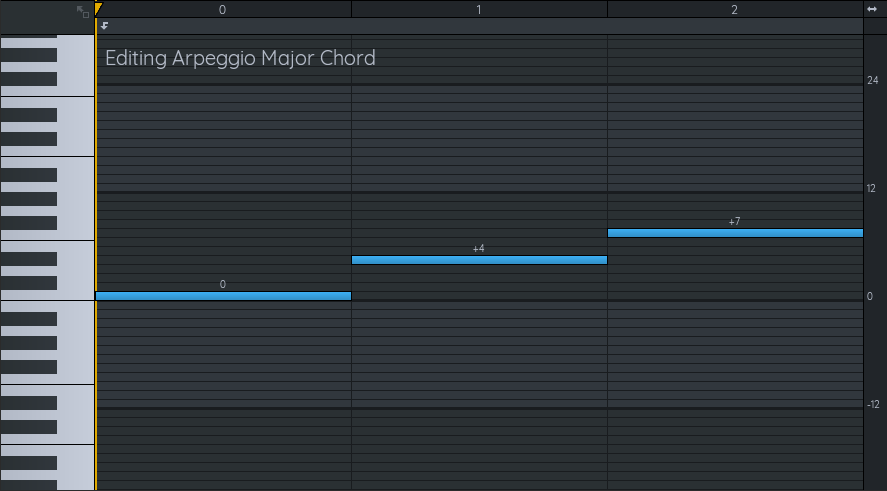
Arpeggios (not to be confused with arpeggio instrument envelopes) are typically used to simulate chords by playing changing notes very rapidly. They work in the exact same way as arpeggio instrument envelopes, but they are not bound to any specific instrument. For example, if you define a "Major chord" arpeggio that repeats a sequence 0-4-7 of notes, you can then re-use this arpeggio on any instrument later on. Saving you the trouble or either inputting many tiny notes, or creating many instruments for each chord.
Arpeggios are handled in a very similar way to instrument. You can add a new arpeggio by click on the + button of the Arpeggios section. To edit the sequence of note you can then click of the little note icon on the right side of the arpeggio button.
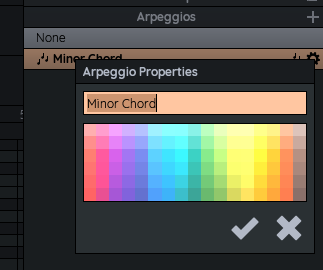
You can also assign a name and a color to each arpeggio by clicking the little gear icon next to it (or double-clicking on the arpeggio). This color will be displayed in the piano roll when the arpeggio is used.
Replacing arpeggios by another
Much like instrument, you can replace every usage of an arpeggio by another by using the "Replace Arpeggio..." option from the context menu.