Editing Patterns
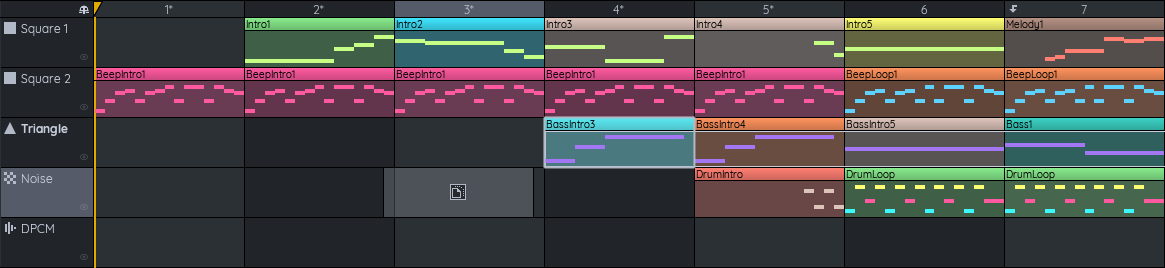
The Sequencer is where you decide which pattern plays when. A pattern is a small portion of a song, usually of fixed length, that is likely to be repeated.
Patterns are laid out on one of the five channels that NES support (more if you have expansion audio enabled).

Seeking
Clicking in the timeline (header) of the sequencer will move the play position. You can also drag the seek back to move it more accurately.
Changing the active channel
Clicking on a channel will make it the active one. Alternatively, you can press the keyboard key F1...F5 (more if using expansion) to quickly change the active channel.
Muting & soloing channels
Clicking on the icon of a channel (Square, triangle, noise, DPCM) will toggle mute. Double-clicking will toggle solo. Alternatively, you can right-click on the channel name to get a context menu that will offer you these options.
On mobile, this is done by long pressing on a channel name, either here in the sequencer, or in the Quick Access Bar.
Force display channel
Clicking the tiny eye icon next to the channel name will force display it in the piano roll. Alternatively, you can press the keyboard key Ctrl + F1...F5 (more if using expansion). You can force display all channels at once by double-clicking on the eye icon.
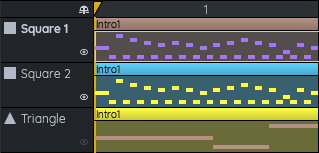
Channels that are force displayed and are not the current channel will appear dimmed in the piano roll. This is useful when harmonizing between multiple channels, or editing drum patterns.
On mobile, this is done by long pressing on a channel name, either here in the sequencer, or in the Quick Access Bar.
Adding & removing patterns
You can add a new pattern by left-clicking on an empty space. Double-clicking on a pattern deletes it.
Editing patterns
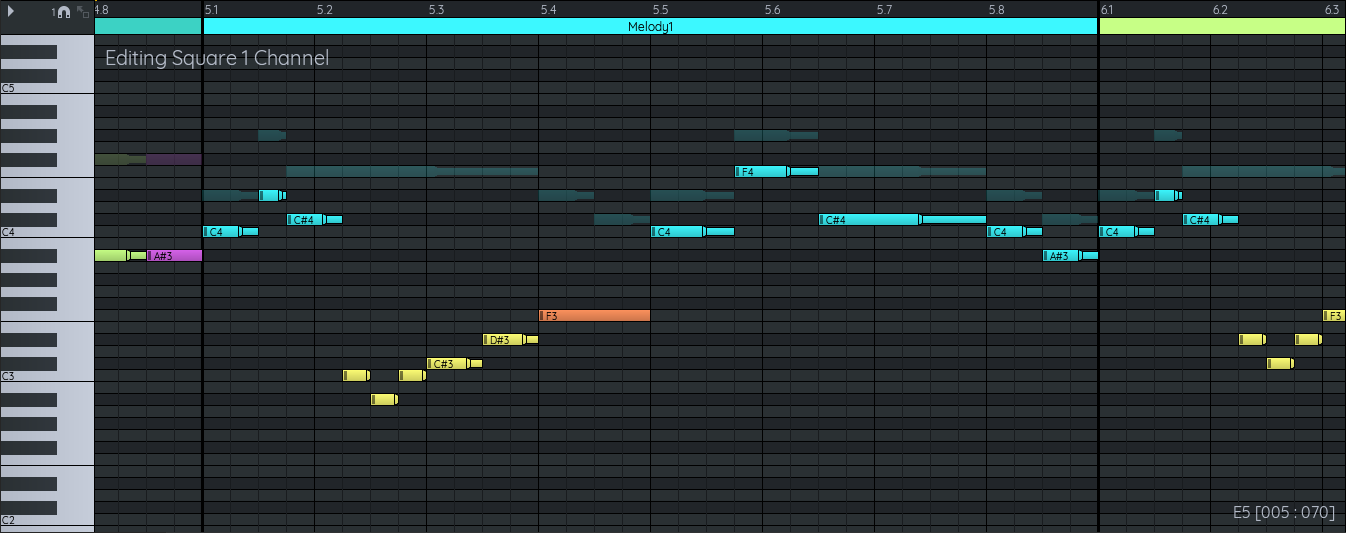
Clicking a pattern selects it and opens the piano roll for the current channel at the location of the pattern.
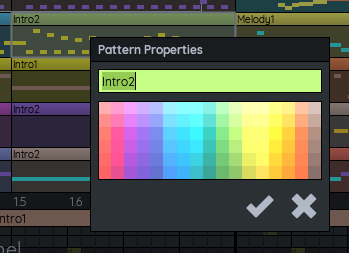
Right-clicking a pattern (or long pressing on mobile) will reveal a context menu with various options. Selecting "Pattern Properties..." allows renaming and changing its color (pattern names need to be unique per channel).
Selecting patterns
You can select entire columns of patterns by right-clicking and dragging from the header bar. You can do a rectangle selection right-clicking and dragging from any pattern location in the sequencer.
To un-select everything, simply press Esc. When multiple patterns are selected, only the color can be edited in the pattern properties.

On mobile, you can select full columns of patterns by swiping from the header. You can do rectangular selection by first selecting a single pattern, then long pressing somewhere else and selecting "Expand Selection".

Moving & copying patterns
When one or multiple patterns are selected, dragging them will move them in the timeline. While dragging, holding Ctrl will create another instance of the pattern(s). An instance is a copy that is linked to the original pattern, it will have the same name and color. Modifying one instance will modify all of them. This will be shown by a "link" icon when dragging.
Holding Ctrl+Shift while dragging will create a completely independent copy of the selected patterns. This will be shown by a "copy" icon when dragging. They will be renamed in the process.

Dragging a pattern to a different channel will create a copy, but delete the original. This is because internally, patterns cannot be shared across different channels. The pattern may be renamed in the process. Holding Ctrl+Shift will preserve the original (create a copy).
On mobile, patterns can be moved in a similar way but they first must be tapped to be given the white highlight. To create copies/instances of one or multiple patterns, first make a selection, then long press where you want to copy them.

Copy & pasting patterns
When one or multiple patterns are selected, press Ctrl+C (or Ctrl+X for cut). Move the selection somewhere else and paste with Ctrl+V. Copy and pasting always create instances of patterns.
Copying & pasting patterns between projects
Copy and pasting patterns between projects is possible When doing so, FamiStudio will assume patterns having the same name are identical. If a pattern is not found, it will offer you to create it for you.
For example, if you copy a pattern named "Chorus1" from a project to another. If no such pattern is found, it will be copied. Otherwise, if an existing pattern named "Chorus1" is found in the second project, it will assume it is the same.
Inside patterns, for notes and instrument, the same rule applies.
Paste Special
Pressing Ctrl+Shift+V will open the Paste Special dialog which gives more options than a regular paste.

- Insert : Will insert the copied patterns and move all the existing ones to the right.
- Extend song : Will extend the song duration to accommodate the newly inserted patterns (Only available when Insert is enabled).
- Repeat : Allows pasting the copied patterns multiple times in a row.
On mobile, the same functionality is accessible by long pressing the "Paste" button while in the Sequencer.

Setting the loop point
The Loop point is where the song will repeat once it reaches the end and is represented by a little arrow.

You can move the loop point around or remove it entirely by right-clicking (or long pressing on mobile) in the header and selecting the appropriate option from the context menu. Alternatively, you can hold the L key and clicking at a location in the Sequencer.
Custom pattern settings
Right-clicking on the header of sequencer and selecting "Custom Pattern Settings..." will allow you to set some customs settings for one or multiple columns of patterns. This will allow you to change the number of notes and tempo parameters.
This dialog will look quite different depending on the tempo mode you are using. To learn more about tempo modes, please check out the Project properties section.
| FamiStudio Tempo | FamiTracker tempo |
|---|---|
 |
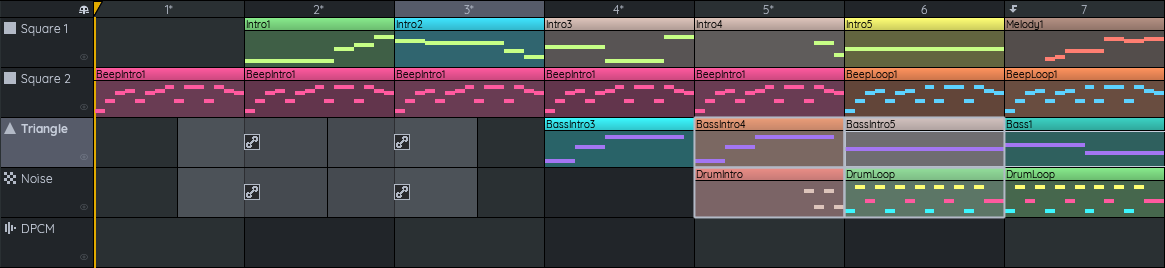
Enabling Custom Pattern will allow you to change the values. Once a pattern has any kind of custom setting, it will no longer take its values from the Song's properties and will be display with a asterisk (*) next to its index in the Sequencer.
The parameters here are the same as when editing the Song properties, but are localized to a column of patterns.
On mobile, the same functionality is accessible by long pressing in the sequencer header and selecting "Custom Pattern Settings".
